Editor’s note: This is complex topic. My list of parts may not look like your list of parts. It depends on what you intend to build. So I’m looking for constructive criticism. We want to be exhaustive, so let us know what we’re missing.
- What’s missing from the list?
- If you have built an AR, what tools proved useful to you?
- Have recommendations about the best brands, or where to find the best prices?
Let us know in the comments below. We’ll be editing this as a work in progress until we cover all of the possibilities.
THE SERIES
- Part 1: Build an AR-15: The Series Introduction
- Part 2: Build an AR-15: AR Calibers
- Part 3: Build an AR-15: Direct Impingement or Piston Operation
- Part 4: Build an AR-15: Tools and Materials
- Part 5: Build an AR-15: The Lowdown on Lowers
- Part 6: Build an AR-15: Intro to Uppers
- Part 7: Build an AR-15: Barrels
- Part 8: Build an AR-15: Choose The Right Buttstock
- Part 9: Build an AR-15: Choosing the Right Optic
Breaking it down
In order to tackle this project effectively, you have to have a clear understanding of where to start. If you’re reading at your computer–in relative privacy–I’d suggest you fire up some Johnny Cash. I’m not suggesting that you steal all of the parts from your employer (if you’re lucky enough to work for a company that sells or makes rifle parts), but you have to take it one piece at a time.
Think about your future rifle in terms of its most basic parts. When it is fully assembled, it is one cohesive unit. The most basic breakdown begins when you separate the upper from the lower. The upper has the actual upper, the bolt carrier group, the barrel, the forend…. The lower has the serialized receiver, the stock, the grip, the controls, maybe the magazine. Each of these items breaks down into smaller groups of parts. While it might look like an odd pile of scrap metal when it is all broken down, every little piece has its place.
And many of these little parts require special tools. That’s the other kicker here. If you are looking at building one AR–only one–then you may end up spending more than you plan on tools and parts. Most of us justify the expense of dedicated tools by openly acknowledging that we will be building and maintaining multiple guns.
[one_third]
Upper Receiver
Upper Large Parts
- Stripped upper Receiver
- Crush Washer
- Ejection Port Cover
- Ejection Port Cover Pin Snap Ring
- Flash hider
- Forward Assist
- Barrel
- Barrel Extension
- Bolt
- Bolt Carrier
- Firing Pin
- Charging Handle
- Charging Handle Latch
- Free Float Tube Handguard
- Gas Tube
- Gas Block
[/one_third][two_third_last]
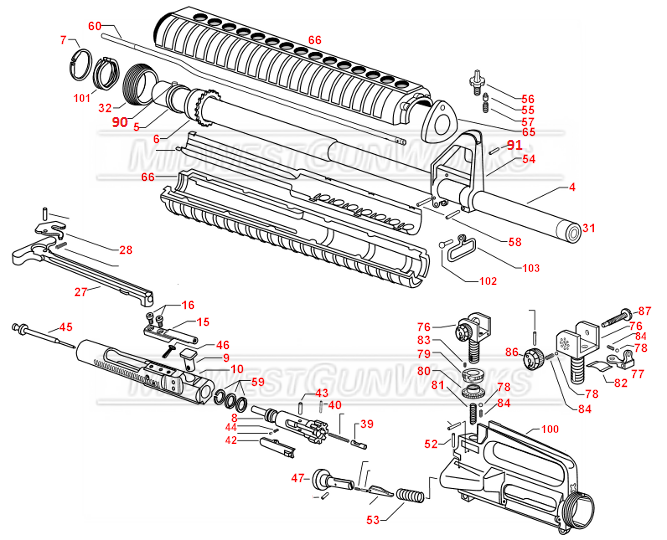
Often retailers will have helpful schematics designed to illustrate the placement of parts. This one is from Midwest Gunworks.
[/two_third_last]
[two_third]
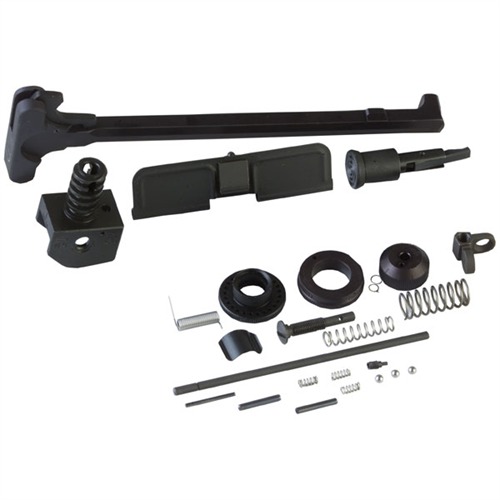
One of the good things about parts is that they can be mailed directly to you–all but the receiver itself. This A2 parts kit is a package from Brownells.
[/two_third][one_third_last]
Springs
- Forward Assist Spring
- Ejection Port Cover Spring
- Charging Handle Latch Spring
Pins
- Forward Assist (Roll) Pin.
- Ejection Port Cover Pin
- Bolt Cam Pin
- Firing Pin Retaining Pin
- Charging Handle Latch Roll Pin
- Gas Tube Roll Pin.
[/one_third_last]
[one_third]
Lower Receivers
Lower large parts
- Stripped Lower Receiver
- Bolt Catch
- Buffer
- Buffer Retainer
- Castle Nut
- Disconnector
- Hammer
- Magazine Catch
- Magazine Catch Button
- Pistol Grip
- Pistol Grip Lock Washer
- Pistol Grip Screw
- Receiver Plate
- Selector
- Stock
- Trigger
- Trigger Guard
[/one_third][two_third_last]
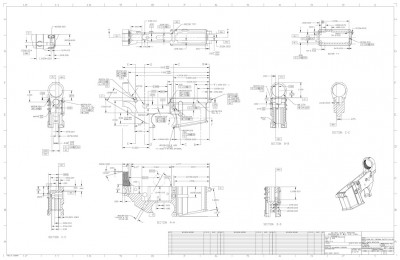
Blueprints are useful, but not as handy as a well illustrated schematic. You’ll need to know a lot about your lower, maybe not this much. But if something doesn’t work right, you could be looking at these numbers very closely.
[/two_third_last]
[two_third]
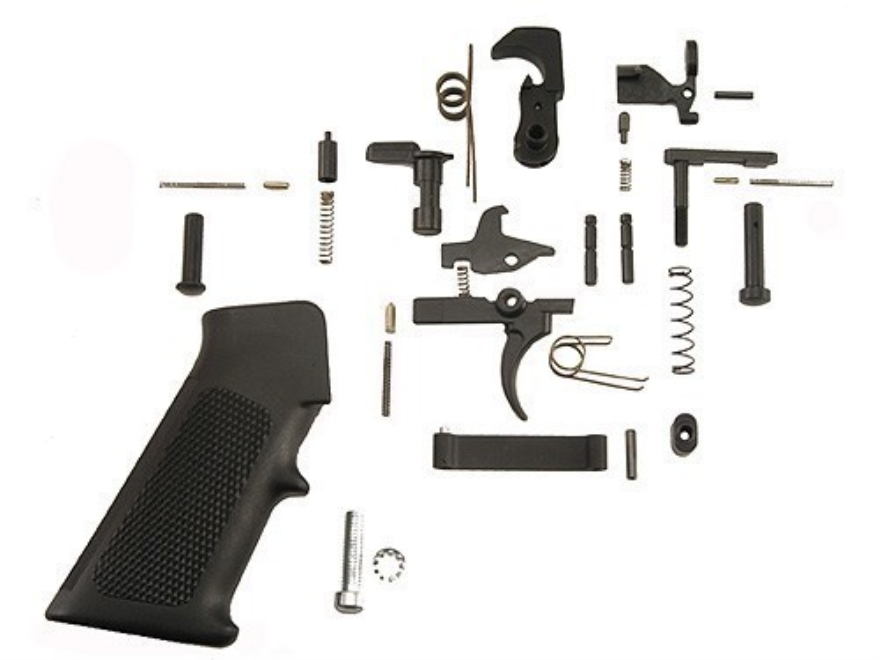
Most parts kits look the same, but there are some distinctions we’ll get into in greater detail. This lower kit is from Midway.
[/two_third][one_third_last]
Springs
- Bolt Catch Spring
- Buffer Retainer Spring
- Buffer Spring
- Disconnector Spring
- Hammer Spring
- Magazine Catch Spring
- Pivot Detent Spring
- Selector Spring
- Takedown Detent Spring
- Trigger Spring
Pins
- Bolt Catch Buffer
- Bolt Catch Roll Pin
- Hammer Pin
- Pivot Detent
- Pivot Pin
- Selector Detent
- Takedown Detent
- Takedown Pin
- Trigger Guard Roll Pin
- Trigger Pin
[/one_third_last]
Tools
We’re not done yet. That list up top may seem daunting, but you have to have almost all of those little bits and pieces in order to make things work like they should. Tools, on the other hand, are a different matter. A tool is a tool. If you have one made specifically for the job, you may have an easier time getting that job done. And there are a lot of tools designed for AR builders.
And now would be a good time to talk about the difference between an AR builder (one who is capable of building an AR), and Armorer (one who might build an AR, keep it running, trouble-shoot, fix problems, etc.), and a gunsmith (one who could make parts for the rifle from raw ingredients). Armorers require a certain level of expertise that comes from training and (more often than not) apprenticeship. Gunsmiths have more training, and often have a set of skills that extend to a wider variety of firearms (whereas an armorer may only have expertise in one platform). Each of these people will need a more specialized set of tools.
Since we’re talking about building an AR, and not milling steel, we’ll keep it confined to the basics. The tools in the list below can be picked up from any of the parts supply houses. Some are available at a hardware store. You may already have some. If you want a specialized set, they come pre-packaged.
- Bench with vise (you’ll need to clamp some things down before torquing nuts)
- Receiver bocks for upper and lower (specially made blocks hold aluminum parts secure without crushing them)
- Punch set (pony up for one with a wide variety of sizes)
- Roll pin punch set (a normal punch mauls roll pins–ask me. I know)
- Nylon/brass hammer (these do a number of jobs without marring metal)
- Ball peen hammer (sometimes a steel hammer is needed)
- Combo wrench for the buffer tube, barrel nut, flash hider (these are great to keep handy–a specialty tool)
- Torque wrench (we’ll be getting scientific later in the process, and this will help with measurements)
- Screwdriver set with hex heads (useful for all sorts of tasks)
- Head space gauges (again with the precise measurements)
Are all tools the same? Obviously not. Think about it in this dichotomy. You can buy a $300 .45 ACP that will hurl a small piece of lead down range. You can spend $3,000 on a .45 ACP that will hurl a small piece of lead down range. Can the target tell the difference? Negative. Can you? I bet you could.
Some tools, like screw drivers, are purpose built to break if you exceed the recommended torque. This is a good thing. Normal screwdrivers may not be so forgiving. And some tools that are made from brass are designed to strike steel without chipping, scratching, or (for you muzzle-loaders and re-loaders) sparking. Brass hammers, nylon hammers, nylon blocks, blocks of wood… it is really up to you. As with most hobbies, there is someone out there who will sell you the exact thing you need to achieve a very specific task. And it will get ludicrously expensive. But you’ll have a kick-ass tool box at the end.
Or you can do like most of us do, and wing it. When I’m building something, I’ll run across a specific need, and see what tool I already have that will solve the problem. If I can’t with what I have on hand, I’ll hit the hardware store in-town. If I can’t find instant gratification there, I’ll hit the internet and wait a couple of days.
It is really up to you and your budget. How much do you want to spend on the one build? Are you going to get use out of other tools–enough to justify the expense? Is it better to buy a set of tools, or pick up only the ones you need?
Regardless of how you decide to do it, you will need some parts and some tools. And if you’re playing along at home, and getting ready for the build, now’s the time to start spending money.
[one_half]
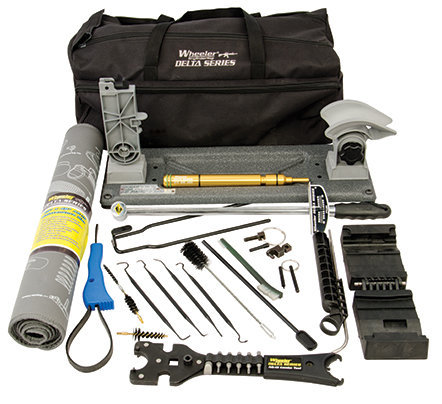
Wheeler Engineering’s Professional AR Armorer’s Tool Kit. Everything you need?
[/one_half][one_half_last]
[/one_half_last]
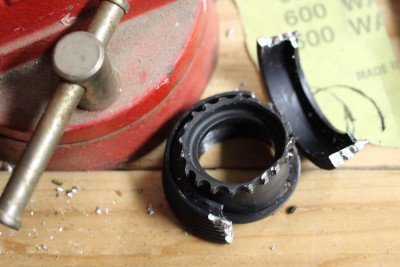
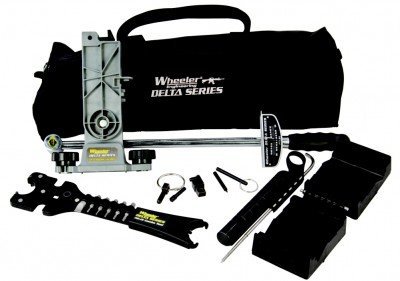
For the takedown pin and spring forever fix, purchase a 4-40 NC tap drill and ever how many 4-40 set screws you have lowers for and being very careful (drilling is very seldom ever needed) just tap the hole for the spring and detent pin, chop about a quarter inch off the spring and install until the set screw just clears the rear face of the lower. Voila! Never again will you lose/or crush that spring just make sure you’ve put the take down pin in place first. CDNN has a sale on their S&W stripped uppers that come without the forward assist or dust cover. About $40 bucks plus postage. Stay the heck out of the sandbox and the dust cover is superflous. The forward assist is about the dumbest thing ever invented, who wants to slam a cartridge that’s already jammed and make the problem worse? For loading the pivot pin spring and detent I use a strong paper clip to push the detent and spring as far in as needed and lock it with another paper clip, put the pivot pin in it’s place and pull the locking paper clip.
We’re can I get parts for my ar12
drill press is not the way to go .I had one come out of cut my hands causen it could have been worse a freind show me a Routher is the only go and a hell of saftyer and quicker so GOD BLESS
There are a half dozen manufacturers of 80% lowers and each sells a kit so you can produce your own 100% lower. Some kits are better than others. Each company also offers videos on Youtube in case you need a visual set of instructions. None of the kits (so far) is interchangeable, i.e., you can not use a Juggernaut kit to finish an 80% Arms lower (unless you mill it to fit). One big lesson from all the kits is to use the shortest drills or end mills you can. The longer ones will “walk” and your finished receiver is “finished” but not in a good way.
OK there are hard ways ad there are easier ways. Roll pins are a bloody pain when inserting simply because they are “larger” than the hole, WHICH makes it difficult and quite susceptible to slipping and then damaging the finish. And if you buy a pre camouflaged upper lower combo you sure do not want to screw up that pretty finish. What to do?
Cheat!
First problem is the roll pins do not place easily into the hole. Second the angles necessary to drive the pins are difficult and then holding the lower properly WHILE holding the pin AND the punch makes the job easily require three hands. What to do?
First invest in a medium sized vice and if you do not have a bench or a place to put a bench, mount it on a 5 foot 2×6 in the middle, that way you can rotate the vice as necessary to apply torque when attaching or removing the barrel. Then buy a vice mount for your weapon. There are many types and some are weapon specific. I recommend shopping around for ones that are as multi platform as possible. I recommend Palmetto State Armory as a source.
Once the weapon is secured properly now you can work.
Roll Pins – by virtue of it’s design it is self securing, they do not just slide in or pop out. Place the pin into a drill and use a fine file to give a short taper to the roll pin on one end so it will just fit into the hole. this prevents the pin from slipping or jumping out when you try to start it. Now take an old long shaft screw driver that you have already destroyed using it as a chisel and cut the tip off. use a drill bit that is just larger that the roll pin and drill a shallow hole in the end of the shaft. This way the pin is secure from slipping and the shaft will not slide off the pin and damage the finish of the receiver. If the shaft is long enough even that difficult pin that inserts parallel to the receiver can be driven most of the way in without difficulty.
If you intend to have more than one build (don’t we all?) then having reusable screwdriver handled tools for the different sized pins is cheap and makes sense.
The only other difficult part are the spring and detent pins. Those bloody things are small and fly real far, so ensure you are in an area where when they fly they are easily found. better yet if you have the capability lay out the receiver inside a box laid on it’s side where you have adequate head and arm room to work so when the pins and springs fly they are easier to find. Also the use of forceps aids in holding and placing the pins.
Then there is the tiny “c” clip for the dust cover. It can be installed using a strong finger nail and removed with a new flat edged screwdriver blade. just keep a finger on the outside edge of the clip to stop it from flying. Or you will be buying a new one.
Palmetto State Armory also sells a bench block that you lay the lower onto that stabilizes it so you can insert other pins and avoid breaking tabs.
Recommended tools to purchase:
http://palmettostatearmory.com/index.php/catalog/product/view/id/12379/
http://palmettostatearmory.com/index.php/wheeler-delta-series-ar-upper-pic-rail-vise-block-156888.html
http://www.midwayusa.com/product/393867/wheeler-engineering-delta-series-ar-15-armorers-bench-block
Face it one broken tab will cost another receiver. Your first build including tools will cost as much as one completely finished unit minus the fancy paint. However when it comes to breakdown without the proper tools you are taking chances. Do you feel lucky?
AR-15s are like tattoos it is hard to stop at the first one.
Good luck.
Wish we could post pictures….
I made an upper receiver vice block out of a nylon cutting board that I got at the thrift store for 4 bucks. And I guarantee you it’s better than the one pictured in this article for holding the upper while torquing the barrel. I used the leftover material for making a simple one that’s about as good for holding the lower while installing the parts kit. I must admit though that making the upper block was more difficult than it looked, and I’m a pretty highly skilled craftsman with a lot of tools. But it’s as good or better than some of the expensive ones. And I enjoy tinkering around with stuff like that. If you’re a good carpenter then you can do it and save some money. It has a piece that goes snuggly up into the receiver and also two pins that go through the holes where the take down pins go. So the force on the receiver when torquing the barrel is very well distributed.
Vice grips have replaced most of my punches. They make it super easy to squeeze in the pins instead of hitting with a hammer. I have built three ARs and vice grips are by far the easiest way to do it.
Is there anything out there comparable to the new Ruger ‘take down’ that one can ‘choose your caliber’ and swap barrels to suit specific needs? That would be super if something like this will ever become available. From beginning to end, ballpark figure for a nice 308?? Keep up the great work.
Thanks
jim
I am looking for instructions to mount a M-16A1 barrel to receiver and getting proper head space. Is there a simple way to do this without tools and gages?
I am looking for instructions to mount a M-16A1 barrel to receiver and getting proper head space. Is there a simple way to do this without tools and gages?
I am looking for instructions to mount a M-16A1 barrel to receiver and getting proper head space. Is there a simple way to do this without tools and gages?
Dave, you’re right, it can be a ‘complex topic’…if you make it one.
First off, lose the A2 upper configuration with the fixed iron sights and/or integrated carry handle. Nobody uses them anymore because the optically superior A/3 Flat top upper is less aggravation and widely available and around the same cost.
There are probably three areas of assembly that might be aggravating or frustrating for an amateur builder, even though you might be mechanically handy. A euphemistic way of putting it would be, ‘it can be a little tricky there’. Detailed AR or any firearm for that matter that had to be taken apart for repair or modification was usually done by an accomplished armorer or gunsmith. (but not all gunsmiths are AR mechanics) So a lot of stuff was ‘trade secrets’ skills and there were not many manuals written on exactly how to do it the easy way. Now there are a lot of videos out there that aren’t bad, but here’s a couple points to consider.
1. Forward assist installation. Must be held at a certain depth position, under spring pressure, before poking in the drift pin.
If this type of assembly is beyond your fine motor skills, dexterity or if you have arthritis, pay the extra 30 bucks and order an upper already completely assembled. The ejection port cover spring is also a ‘brain teaser’.
2. Putting the micro-detent pins/springs in for the receiver sseparation takedown pivot pins. The front (longer) one is a pain because you have to slide the take down pin in with the detent pin groove aligned properly to fall in the groove correctly to properly set in position. WHILE YOU’re HOLDING the micro detent and spring in its hole far enough back during the process. I used to use a spark plug feeler guage to hold it while sliding the take down pin so the groove can catch it. Someone told me they used a needle or drill bit in the small hole in the side of the micro detent and spring hole in the side of the lower receiver.
3. The back pivot pin micro spring/detent at first seems easy because you put the take down pin in first and then the micro detent and spring in the hole from the back. Except when you begin to screw down the back buffer tube locking nut over the sling ring’s lower area which puts the pressure micro detetn spring. As you tighten it up the spring refuses to obey and remain straight. Especially on the last few turns. If you’re lucky it just bends and kinks. But Just before you think you’ve got it licked, the spring usually it takes a moon shot and you’ll never see it again. These springs are about a 16th over an inch and have about a quarter inch of total compression. Some are simply too ‘tense’ for the function of pin pushing in and out and can be ‘clipped’ with side cutters to a more humane tension. The original idea of that detent is just to keep the takedown pin when you’re opening the gun for cleaning from falling out to where you’ll never see it again. Not to jam tighten the take down pin to where you require a hammer to get it to move. Always check your proper fits with all these pins and parts before your final
assembly and press in the roll pins, etc.
4. The Bolt hold open release lever is another irritations. Again, you have to hold pressure over the tension in alignment while you squeeze/press the roll pin in. I start the roll pin first, just enough to stay firm but not block the lever. Then i stick another drill bit/pin/etc. in the other end to keep it aligned while you then tap the roll pin in some more until it catches the lever hole. Then you can use a vice grips and squeeze the whole thing together.
5. This is not a high skill requirement, but it does have a little to do with counter-intuitiveness. When you are finished assembling the lower receiver and are ready to put on/in the pistol grip, you have to be careful so that the selector detent (unusual shaped gold colored pin) doesn’t fall out while you’re screwing on the grip. There’s a couple ways to do this so think about it before you just try to slap the pistol grip in place.
If this is your first AR build, i’d strongly suggest that you order a packet of extra springs and all small detent pins. if you lose a roll pin your local hardware store should have what you need.
The other thing is the forearm. Nobody uses the old plastic two piece spring pressed ones anymore. The newest M-16’s coming into service will no longer have the same old front triangle sights or rear carry handle set up. And they’ll all have integrated quad rails. It’s actually not much more for a decent free floated quad rail which is actually easier to install. And back up flip up iron/polymar sights are cheap and work well.
Okay people, lets ‘gun -up’! If you shop around carefully you can get a decent complete basic carbine kit for around five hundred and another hundred or less for a lower–and you can get an 80% lower if you really want to be ‘off grid’ and private. Next to repealing ALL anti-2/A unconstitutional laws, its the next best thing!
You need lots of JB weld so when you break stuff you can glue it back together and sell it like the used car dealers do…
Watch Out for those Brownell fire control parts kits, or at least the ones from Colt Defense Industries. They are apparently mix & match parts (whatever is in the leftover parts bins). Mine came with oversized pins and Standard sized hammer (pin hole)..only the hole in the trigger matched the pin size…..but makes no difference the oversized pins won’t fit the lower receiver (both holes in the lower receiver are .154, not .168). I’ll either have to buy 2 standard size pins separately or (maybe) exchange both oversized pins plus the trigger….or some combination of those choices.
You can also just pour out as many complete AR-15 lower receivers using out mold. Check out http://www.gunmold.com
You can also just pour out as many complete AR-15 lower receivers using out mold. Check out http://www.gunmold.com
Dummy rounds or snap caps. For function checks and troubleshooting. Small needle nose plyers. Fine sand paper. Jewelers files.
http://www.luckygunner.com/snap-caps-223-556-magpul-mag215