The new Pro-Chucker 7 is RCBS’ offering to the reloader interested in productivity and efficiency. Whether you are new to reloading, even just considering it for the first time, or an old pro with several wildcat loads named after him – you’ve heard of RCBS.
Decades ago (more of them than I’d rather admit to) I bought my first reloading press – the RCBS Rock Chucker. It was a single-stage press that was plenty good enough, until I starting shooting far faster than I could reload and expanded to a half-dozen calibers. At that point, one realizes the need for a more productive machine – one that can turn out a couple hundred rounds per hour or more, and do it consistently. That is where progressive machines come in, and RCBS is hoping to bring their long revered brand name into the mix. But first, a few words about reloading presses for the beginners.
Reloading is a Hobby
I always preach that reloading is and ought to be a hobby unto itself. Don’t get into reloading to be self-reliant (unless you can manufacture brass, gunpowder, and primers you’re fooling yourself anyway), or to save money (recovery of the startup cost will take years, even if you shoot every day). Get into it because you want another hobby that is directly related to your shooting passion, and one you’re willing to put significant time and resources into. That’s as far as I’ll take the soapbox speech for this series!
The first thing to know is the difference between a single-stage press and a multi-stage or “progressive” press, sometimes called a “turret press.” As the name suggests, a single-stage press allows only one case and die to be used at a time. I still highly recommend them for beginners, as you’ll be focused better and learn the fundamentals of reloading properly. The downside is, of course, it’s slow. Performing one step at a time to a hundred cases and then changing dies to perform the next step, and so on. Where the single-stage press shines is for making rifle ammunition, especially the high-quality match stuff.
[one_half]
[/one_half]
[one_half_last]
[/one_half_last]
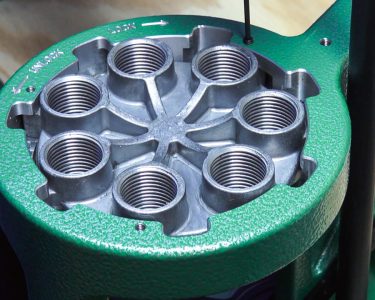
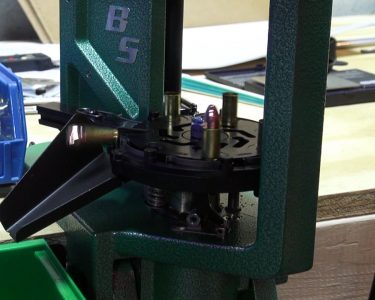
But I’m a handgun cartridge reloader, and I want volume – which brings us to the multi-stage progressive press. Instead of one case at a time, the multi-stage has a shell plate that holds numerous cases and rotates – either by hand or automatic indexing (the Pro-Chucker 7 is auto-indexing). This is accompanied by a head that accepts all the dies needed for that cartridge, the powder measure, and some can even accept additional tools like component feeders and safety check systems. Once all the positions of the shell plate are filled, each pull of the handle produces a finished round of ammunition. Each position completes one or more of the steps in producing the round: De-capping, Sizing, Flaring, Charging, Seating, and Crimping. This is where the name “progressive” comes from, lest you think the machine leans to the political left. The RCBS Pro-Chucker 7 is such a machine.
Installing the Pro-Chucker 7
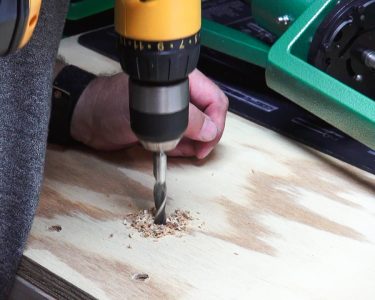
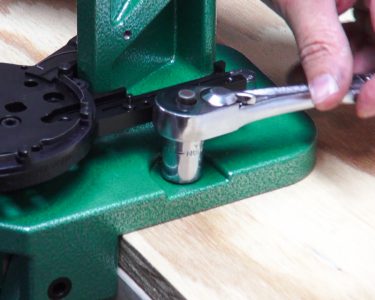
But this is not a “how to reload” piece, so let’s talk about the RCBS Pro-Chucker 7 and start with the setup and initial operation of the machine. Nearly everything you need is in the box. I say “nearly” because you will need to provide some hardware to mount the press, and there are no tools supplied. RCBS can’t know the thickness of the workspace you’ll be mounting to, so they are forgiven for not providing those bolts. You’ll need to go to the hardware store (or big-box facsimile) for those, and while you’re there get a good set of hex wrenches and an adjustable wrench or two if you don’t have them. You’ll need those tools.
[one_half]
[/one_half]
[one_half_last]
[/one_half_last]
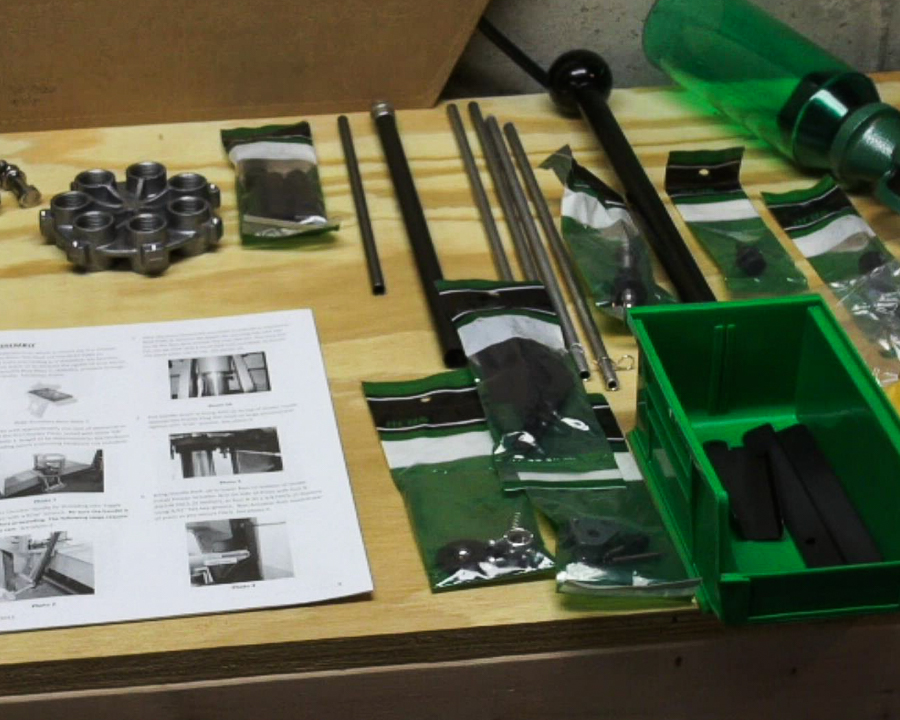
Having selected the space for mounting the press – something you’ll want to do before you even open the box – it starts with unpacking the Pro-Chucker 7 and all the parts and accessories. Lay the parts out on your work table and identify them according to the parts list in the owner’s manual. Getting organized now will save time and frustration later. The majority of the parts come in sealed plastic bags, complete with the RCBS logo – but without the benefit of any parts number, description, or even a reference number. This writer would very much have appreciated those labels, as several parts look very similar, and some are nearly identical save for the ‘large’ or ‘small’ detail that is not always easy to see.
The setup of the machine was mostly straight-forward, but there are a few spots that are a little tough to understand. I have what I consider at the least to be average mechanical inclination, but sometimes you need help via good instructions and illustrations. The photos in the setup guide are poor quality, black and white, low contrast pictures that often make it nearly impossible to see the parts being described (I’ve seen clearer pictures of Bigfoot, LOL). Joking aside, there is certainly room for improvement there. But, I powered through and eventually got the Pro-Chucker 7 through the basic setup. If you are new to reloading or are all thumbs when it comes to assembling things, you may have some trouble. By a six pack for a friend who’s a mechanical wizard and get help.
[one_half]
[/one_half]
[one_half_last]
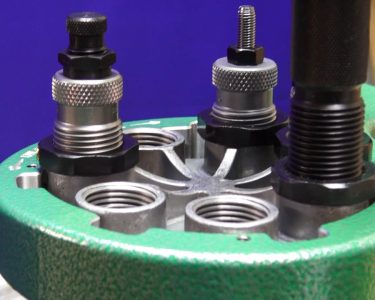
Though handguns generally only require three dies plus the powder dispenser, there is ample room for additional productivity tools.
[/one_half_last]
The footprint of the press is small. I mounted it on the edge of a workbench, and it only penetrates the tabletop about 5 inches from the front edge. Allowing at least a foot from the corner of the workspace is a good idea so that you have room to work. The machine operates smoothly and quietly. The efficiency of the ram’s transfer of power means you don’t need to lean on the handle to get things done.
[one_half]
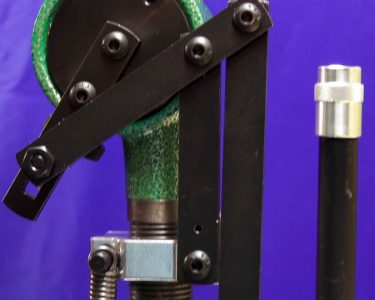
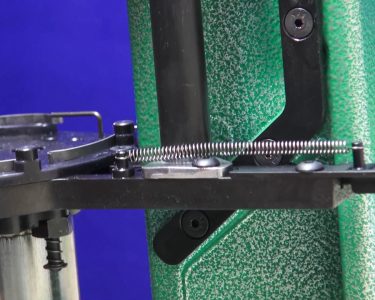
The linkage that operates the powder dispenser ensures a consistent charge every time. To the right is the primer feeding tube.
[/one_half]
[one_half_last]
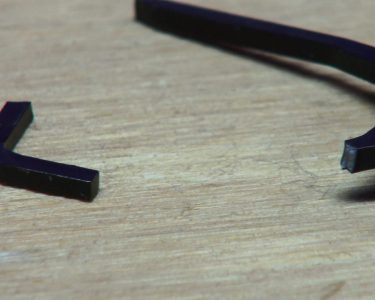
A broken part prevented the shell plate from indexing and stopped the project until RCBS provided a replacement.
[/one_half_last]
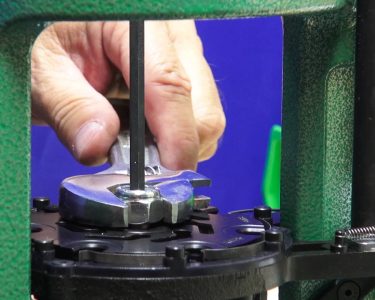
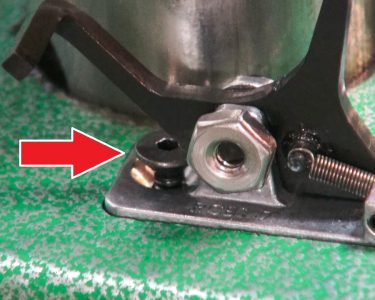
Mechanically, the Pro-Chucker 7 seems to work nicely upon first setup. One part failed, however – the shell plate indexer broke due to stress or defect, and I had to ask RCBS for a new one. Customer service was hassle-free and they sent the assembly for the part replacement. Installing that was a challenge, though, because the design puts the hex-key screw head right under the pivoting indexer. I had to cut my Allen wrench down to a nub to get even partial access to it. Clearly, this was not designed to be user-changed.
[one_half]
[/one_half]
[one_half_last]
[/one_half_last]
Final Thoughts
All in all, the RCBS Pro-Chucker 7 looks like it brings something to the market. There is some fierce completion out there, with companies like Lee, Hornady, Lyman, and Dillon making progressive machines that sell very well. Here’s where the Pro-Chucker 7 lines up against the others in terms of listed base price:
- RCBS Pro-Chucker 7 $1,098
- Dillon Precision XL650 $ 650
- Lee Load Master $ 400
- Hornady Lock-n-Load $ 450
To each of these you can add a lot of accessories; some really need at least a few just to get started properly, like the Dillon for example. When I bought my Dillon, I doubled the price by the time I added what I consider the essentials – and that did not include any bullet or case feeders. If you’re shopping, be sure you add up all the necessary “extras” to get your real prices! Also, bear in mind we’re comparing the RCBS 7 stage press to three 5 stage presses.
RCBS offers some accessories to enhance the productivity and simplicity of the Pro-Chucker, including:
- Automatic Bullet feeder $563
- Tube bullet feeder $40
- Tube case feeder $34
I got the RCBS set up and produced the first round of ammo using 9mm RCBS dies. It takes several hundred rounds or more to get the kinks worked out between new machine and new operator – but I’ll be back with a Part 2, and we’ll look at how the RCBS Pro-Chucker 7 makes ammo and attach the tube case feeder to see if that increases its automation.
Interested in purchasing your own RCBS Pro-Chucker 7? Click here to get pricing and information.

Nice to run across this review, which was done in an outstanding manner, but I have to add my 2 cents. Normally I really do enjoy RCBS products built like a “tank” and gets the job done. After loading for 30+ years on my Rock Chucker I wanted a faster means to load bullets now that I’m in the Single Action Shooting Society. Last year I finally decided to get this new Pro Chucker 7.
The first part for me to break was also the Indexer 7 Arm and replacing it was a pain due to the mount. I strongly recommended to RCBS to place the 5-40 screw from the other direction and thread the mount “Ear” closest to the ram. Today the darn thing broke again. The first time to replace this I think it took me 2 hours.
Today I was making an attempt at setting up the Case Tube Feeder which is very pricy and a royal pain to set up. The Instructions on “Adjustment” page 15, needs to be completely revamped. The Adjustment Section did not clearly state the name of the item# from the parts listing and the pictures should be in color and next to each numbered setup procedure. I gave up after I kept getting more than one case dropping, and the plunger spring became distorted from trying to setup the Top Stop Pin. The Stop Pin end where it rests again the next shell casing should be thicker and made from a sticky rubber to help assist and prevent it from sliding by.
Final conclusion, you would think for the price that this too should be ” THE Cadillac” of reloading presses, but this is one example I’m trying to be patient but wish RCBS would make some new improvements to this press and give us die hard customers some newer parts that will work better.
Marshal Ruger,
Byron, Ga.