
Trail cams can make the difference between success and failure this hunting season. Trail cameras are one of the best inventions ever in modern deer hunting history, providing 24-hour scouting of an area. Image courtesy Bill Winke.
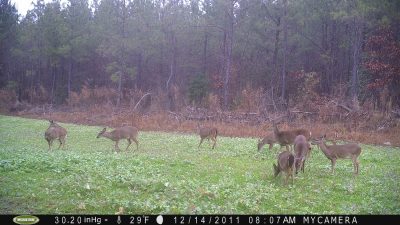
Big groups of does caught on camera after mid-November signals the rut is definitely winding down or even over.
SERIES
- Part 1: Top Four Tips To Scouting Now
- Part 2: Early Season Deer Stand Tips
- Part 3: Follow the Moon
- Part 4: Five Top Deer Gear Essentials
- Part 5: Five Top Backpacks
- Part 6: Essential Trail Camera Know-How
- Part 7: Making The Call
- Part 8: Keeping Warm
When it comes to scouting and whitetails, trail cameras are one of the best inventions ever created. Once consisting of a cheap plastic housing that held an actual camera and snapped images when triggered by motion, manufacturers were quick to respond to demand for tougher, more capable products. This came with technological improvements that began by incorporating integrated cameras that took still shots, evolved into cams that took both high-definition digital images and video, and today can network with other cameras to create virtual security systems on your plots and key deer trails and even send the images to you so you don’t need to regularly check them.
If you haven’t incorporated trail cameras into your pre-season and in-season scouting routine, you are missing out on a lot of intel that could fast-track your success in the deer woods this season. Here’s a before-to-after collection of tips to help you get the most out of your trail cam surveillance efforts; efforts that will hopefully help you fill your tag on one of the biggest bucks of your life.
Pre-Season Scouting
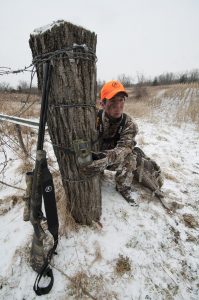
Check cameras and rehang them in areas where you plan to hunt to determine when exactly to sit your stand. Image courtesy Bill Winke.
You can’t be everywhere all the time, but your cameras can. What’s even better, where at one time $500 and $600 models were the norm, there are a number of properly working cameras that can be had for $100 or less, making it easier than ever to build up your collection and keep your eye on more ground. Follow these tips when setting up your cameras before the season ever starts.
- When setting cameras out for the first time in late summer or early fall, place cameras in those locations where deer typically move or where you’ve enjoyed success before. These include deer trails leading from thick cover into food plots or ag fields, along the edge where a cutover borders mature trees, where a fence has gaps and the wire has deer hair stuck in it, at a narrow crossing along an otherwise wider creek, etc., are all good options. If you’ve never hunted the land, look for areas where there are an abundance of tracks coming in and out of food plots or along trails and try that first. Check the same features mentioned above. Natural pinch points created by either terrain features or plant growth are always a good spot to try hanging a cam.
- If it is legal where you live, create a salt lick or hang a feeder. These both in the open and in the cover of woods can nab good results and will serve to congregate deer. Hang your cam facing where the deer will come in and feed for great shots of unhurried deer.
- Set cameras on a tree, fence post or even a pole or 2×4 driven into the ground, about 3- to 4-feet high and 30- to 40-feet off the spot you want the camera pointing. Test a unit before trusting how far the manufacturer says it will trigger. There are many claims about units triggering from farther away than they actually do. And even if a cam can trigger on movement as far out as 60 or 70 feet, you don’t want to be so far back that it fails to trigger when needed, nor so close that you get a bunch of pics of parts of deer.
-
Video is cool, but it also uses up tons more memory on your card and tends to trigger a tad slower than stills. For serious and reliable surveillance, most hunters still go with still shots.
- Unless your camera sends images to you via a cell service, check them only during the middle of the day in order to avoid spooking deer. Never swing by during prime movement time lest you begin reshaping deer patterns before the season has even begun. Another option is to check them well after dark.
- Check your cameras no less than once a week and if possible, at least twice. Again, don’t overdo it. You don’t want deer to feel pressure until it is inevitable with the start of hunting season. None or only a few deer pics on a camera? Move it to another location until you pinpoint key deer activity. You want to know precisely where deer are moving and when in order hunt a stand or set one up for a high chance of success. Deer patterns will change as the days become cooler and shorten, and what you see on the cameras will clue you into the food sources and bedding areas used by the most and/or biggest deer as opening day draws near.
In-Season Scouting
- As the season begins, hang or hunt stands where you’ve seen the biggest bucks. Cameras should have a date and time stamp and possibly even weather info at the bottom of each image (at least temperature, if nothing else) so you can determine when and where the big boys are moving on a regular basis. In the earliest days of bow season, many bucks may still even be found in bachelor groups. Identify the big boy in the group and make sure you pick him out when they show up. Don’t go sending an arrow or bullet flying at the first nice rack that steps into view.
- Don’t stop running cameras just because the season is in. In fact, it is now more important than ever to keep them up and running. You can track changing deer patterns by what you are pulling from the cameras, which can impact how you hunt. For instance, when you’ve identified most of the usual bucks in an area and then all of a sudden new bucks begin showing up, you know the rut is on. Now is the time you need to be in the woods.
- In an interview with North Country Whitetails’ wildlife consultants Craig and Neil Dougherty some years back, they suggested watching for groups of does to return to food plots or begin feeding together to indicate the rut is winding down and many of the does have been bred (late November, on average). Sit on those plots getting hit by doe groups as a buck still eager for action may come cruising in search of one last doe in heat.
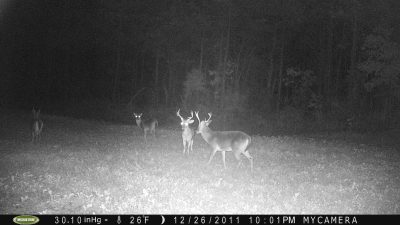
Keep cameras running even after hunting season ends to take an inventory of the bucks for next year.
Post Season
- Keep cameras rolling after the season ends to conduct a “survivor’s” inventory and determine which of your trophies made it through the year and which ones may have succumbed to the pressure. Compare these images with ones from before the season to build an inventory of bucks on your land.
- Set cameras on food plots and watch for shots of bucks with single horns or none at all to indicate they’ve begun dropping their antlers. Let the cams run for a few more weeks and then if you want, you can take them up for the season so they don’t endure the wear and tear of being outside an entire year.
- Make notes of what you learned from each camera’s images and use that to begin your scouting efforts when the next season is drawing near.
Top Trail Cam Choices
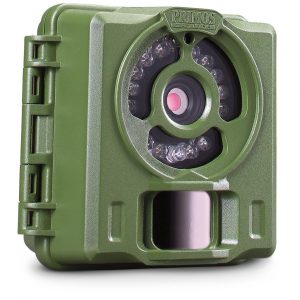
Primos Bullet Proof 2—Looking for a super affordable, super-simple camera that you can pull from the box, hang and go in a matter of minutes, and that actually works great? Look no further than the new Primos Bullet Proof 2. ($87)
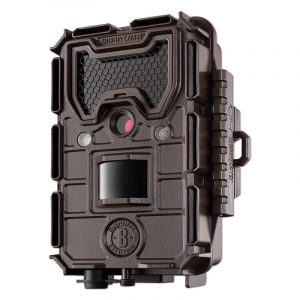
Bushnell Aggressor No-Glow—A continuation of Bushnell’s popular Trophy Cam HD Series, the Bushnell Aggressor No-Glow is built to be the line’s most rugged, durable and best quality image camera. It’s easy to use and has a reported lightning fast 0.2-second trigger speed. ($170)
Browning Recon Force Full HD—Another camera billed as simple to use (as it is minus some of the extra features most hunters will never use anyway), the Browning Recon Force Full HD has a 2-inch color display to preview images and videos right in the field. Zero Blur technology shoots pics at a faster shutter speed to mitigate motion blur from moving deer at night. ($190)
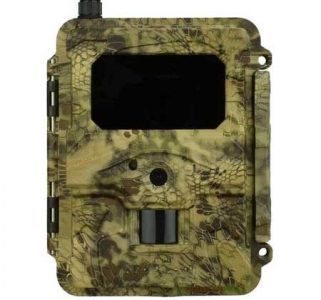
HCO Spartan GoCam—Don’t disturb the woods to collect your images, have them transmitted to you cellularly with the HCO Spartan GoCam. Utilizing an AT&T DataConnect Pass SIM card, simply install the card, activate the service and go. You can stop and start the service at any time so you aren’t paying fees when the thing is not working in the woods for you. ($400)
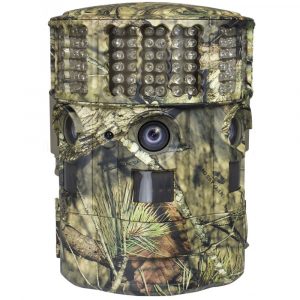
Moultrie Panoramic 180i Game Camera—From one of the oldest names in trail cam technology comes some of the newest technology. The Moultrie Panoramic 180i Game Camera delivers images in 180-degree panoramic views for the ultimate in visual surveillance of food plots and trails. ($300)
Hello,
Looking for a camera that takes a picture (~ 50 ft. focus) when a bullet hits a metal target, then sends the pic via phone message.
Thanks, jack
think this is among the most important info for me. And i am glad reading your article about of best Hunting Trail Camera.